
Guide ›
Tutorial: your first photo
Updated
From a card full of RAFs to a finished photo and a recipe you can use again, in eleven steps. It takes about fifteen minutes, on Mac, iPad or iPhone. Each step links to the guide for the details.
You need RAF Film Lab on macOS 26, iPadOS 26 or iOS 26 (join the beta) and a few RAF files from a supported Fujifilm camera. The first time the app opens, a short tour points out the controls used here. To see it again, choose Help › Show the Tour on the Mac, or Settings › Help on iPad and iPhone.
1. Import a few RAFs
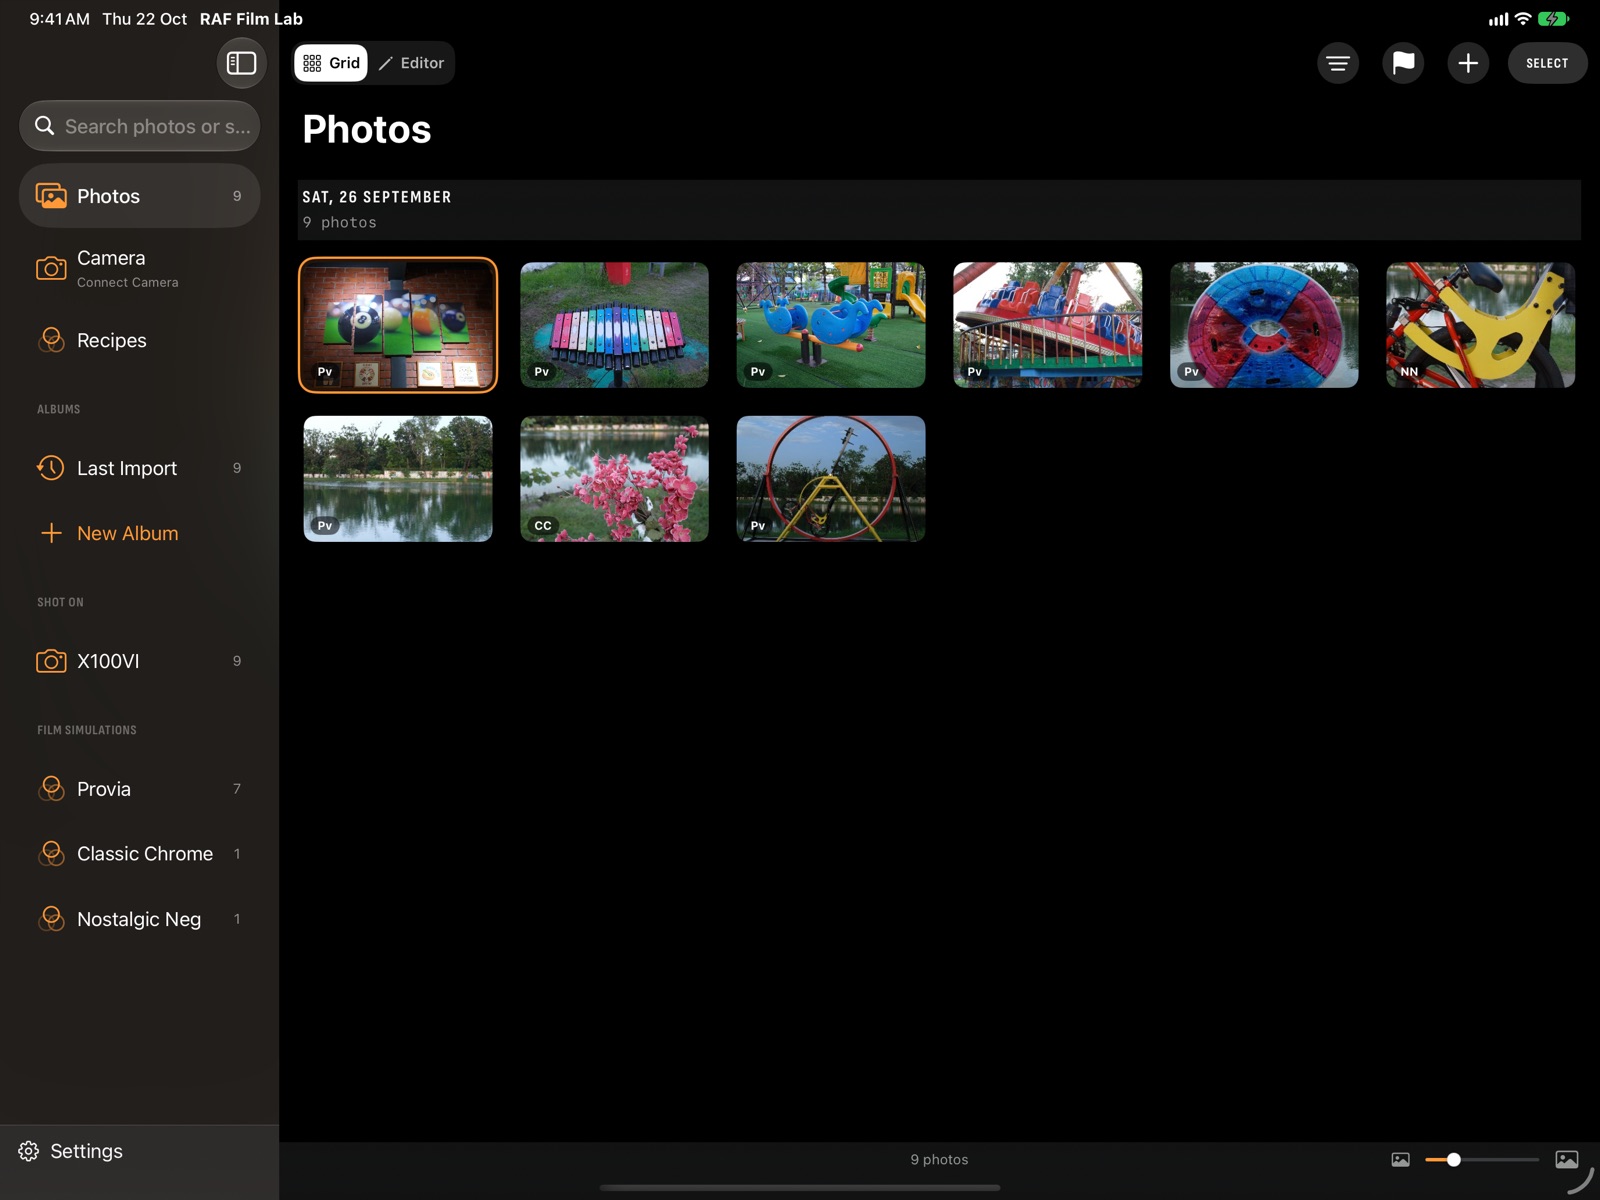
Tap or click + (Import RAFs) in the toolbar and choose where they come from:
- From Files…: RAF files or a whole folder.
- From Photos…: photos whose original is a Fujifilm RAW. JPEGs and HEIFs are skipped.
- A camera: plug it in over USB in USB CARD READER mode and pick it under Cameras.
On iPad and the Mac you can also drop RAFs onto the grid. The new photos open as Last Import. Each one is developed in the background, and the grid counts the ones still developing. On the Mac, originals stay where they are; on iPad and iPhone they're copied into the app.
2. Open a photo
Tap a photo on iPhone and iPad. On the Mac, double-click it, or select it and press Return.
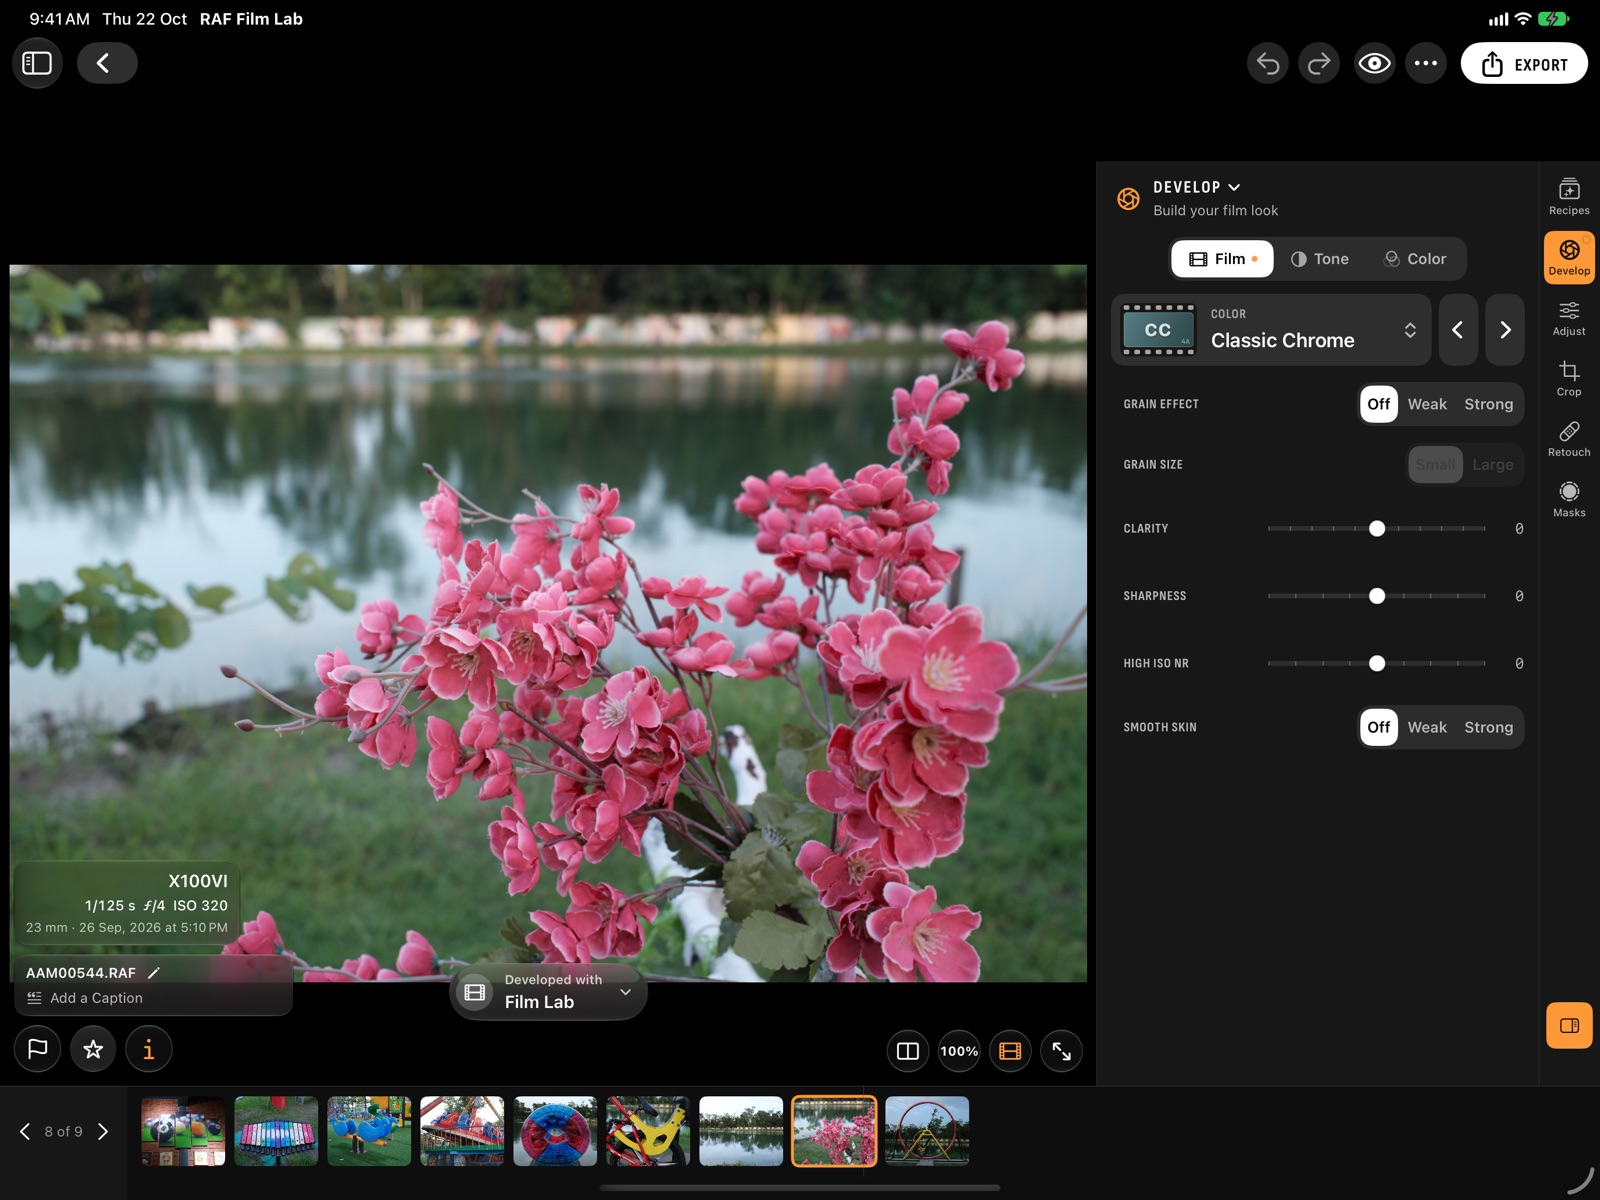
It opens in the film simulation it was shot in: RAF Film Lab reads it from the RAF, so a frame shot in Classic Chrome looks like Classic Chrome from the start. The editor has six workspaces: Recipes, Develop, Adjust, Crop, Retouch and Masks.
- On iPhone they sit in a dock under the photo. Tap one to open its controls, with its categories at their foot, and tap ✓ to close them again.
- On iPad and the Mac they run down the window's edge, with the open one's controls beside the photo and its categories above them. In a narrow iPad window, or in portrait, the controls sit under the photo instead.
3. Try another film
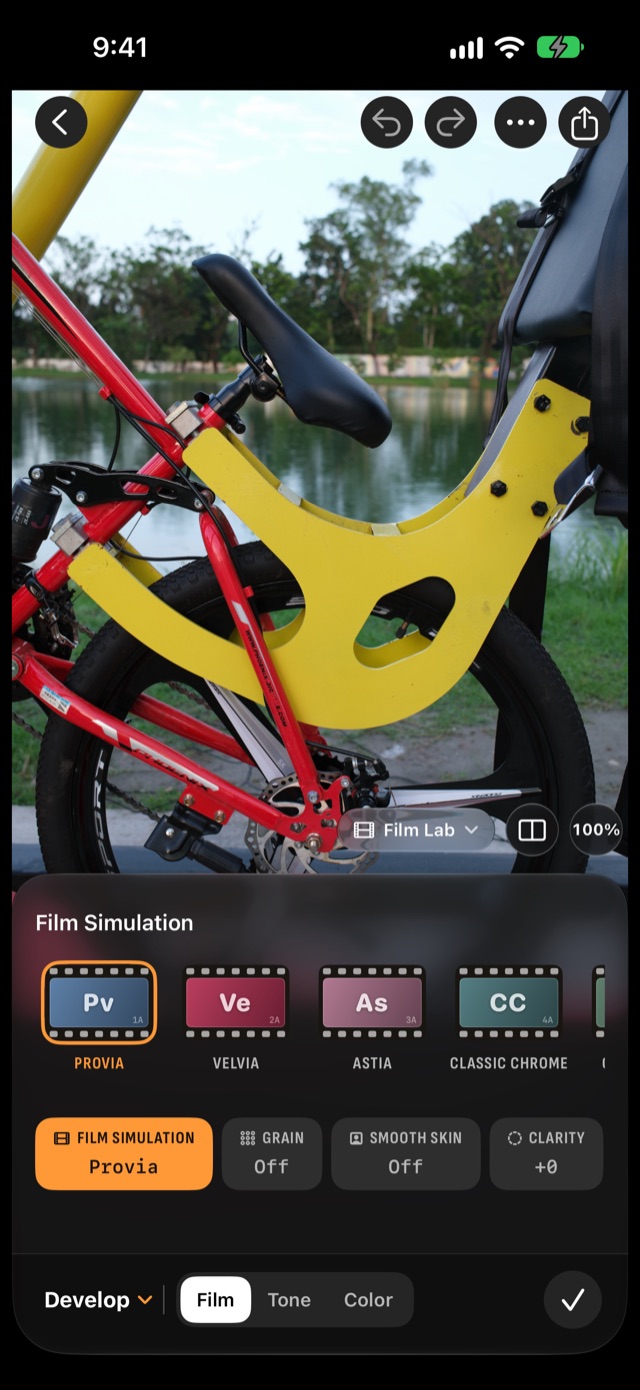
Open Develop, then its Film category, and pick another simulation: say, Classic Neg or Acros with its red filter. All 20 are there, whichever camera shot the photo.
- On iPhone, the films are a row of film frames: swipe along it and tap one.
- On iPad and the Mac, open the film menu and hover over a film to see it on the photo before you pick it, or step through the films with ‹ and ›.
A photo is developed once, with its film and in-camera settings, and every later edit is drawn on top of that develop. With Film Lab, the new film shows on the photo at once and the photo develops on its own a moment later. The status at the photo's foot says who developed it.
Not sure which film? See what each one does →
4. Set the in-camera settings
Develop's other categories hold what your camera's menu holds. Try a few:
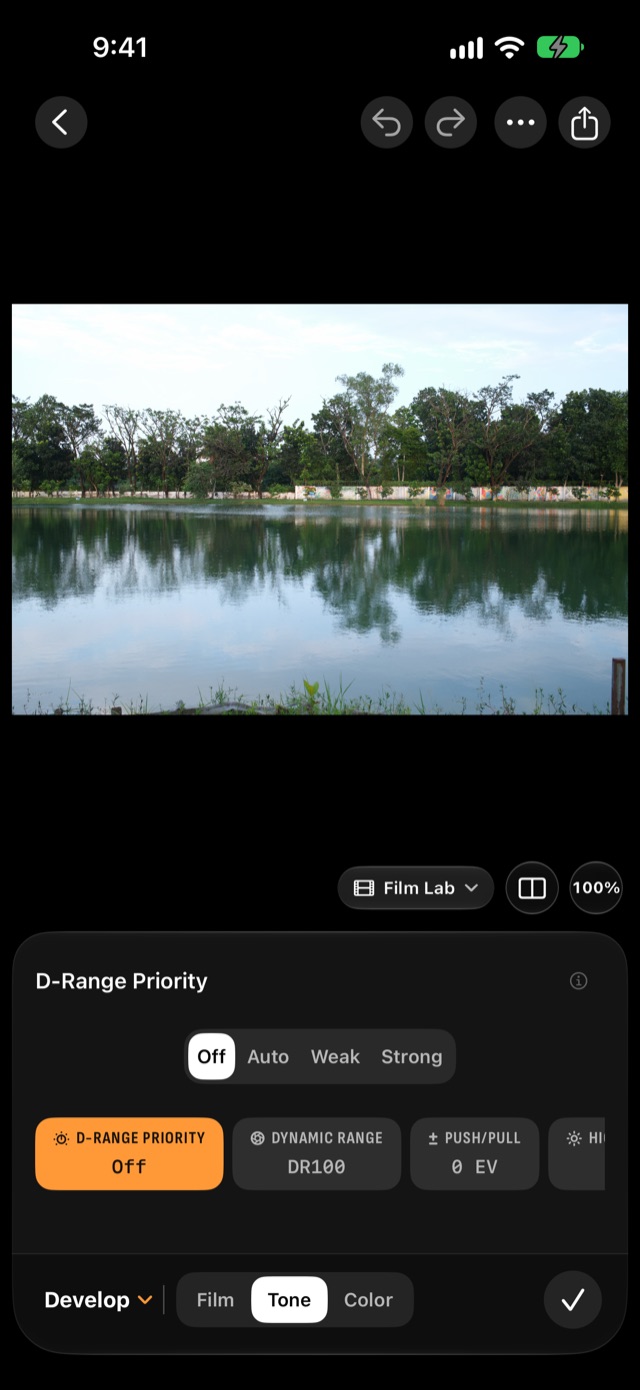
- Tone: set Dynamic Range to DR200 or DR400 for a bright sky, and lower Highlight Tone. The Dynamic Range the RAF was shot at is marked.
- Color: raise Color Chrome Effect for deeper, richer saturated colours, or shift the white balance a step towards red for warmth.
- Film: add Grain Effect, weak or strong, small or large.
On iPhone, tap a setting's chip, then drag the ruler above the chips; tap its value to type a number. On iPad and the Mac, drag its slider, and double-tap or double-click to reset it.
5. Save it as a recipe
A recipe is a photo's Develop settings under a name. Open the Recipes workspace, tap Save Recipe and name it.
It's now in Recipes (in the sidebar, or a tab on iPhone), on a card tinted by its film. Touch and hold or right-click it and choose Share Card for an image with the settings and a QR code: anyone can scan it, with or without the app.
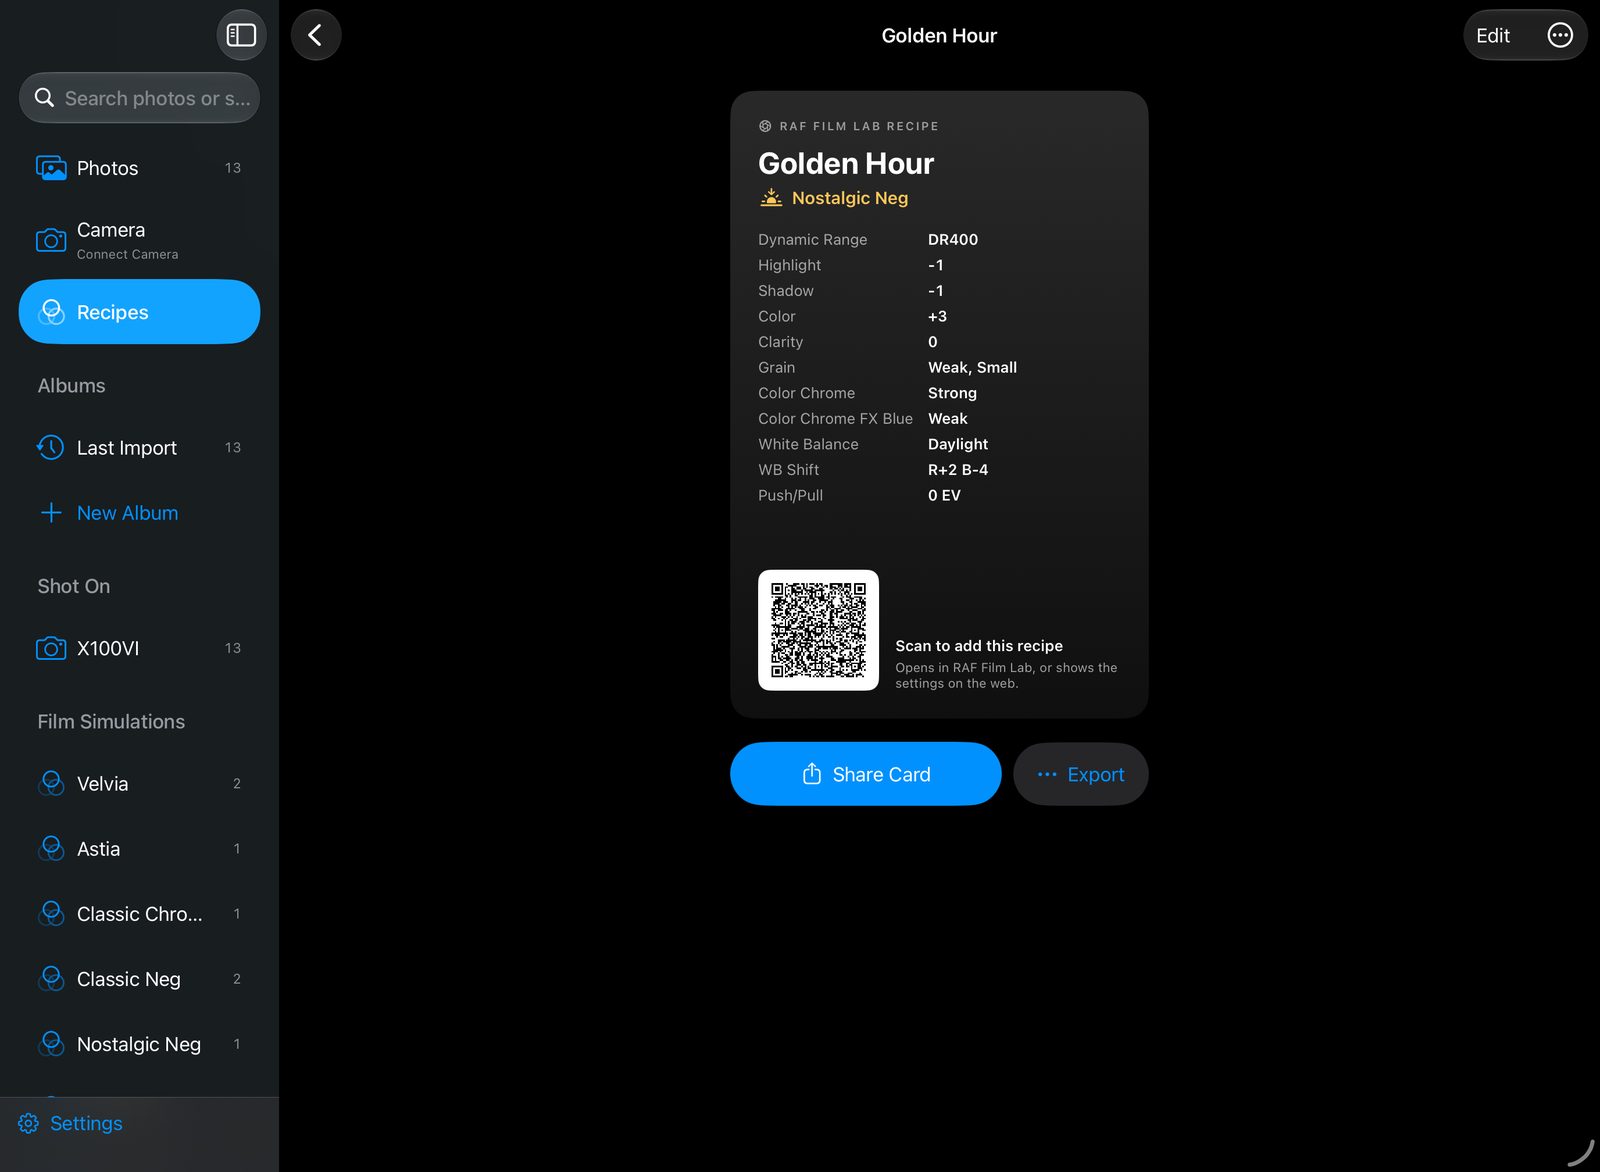
6. Apply the recipe to the shoot
In Recipes, choose Apply to Photos… on your recipe, and pick all the photos, the ones not on it yet, or your picks. Or, on any one photo, open the Recipes workspace: on iPad and the Mac each recipe is a card of that photo developed in it, so you can see them side by side. Tap one to apply it.
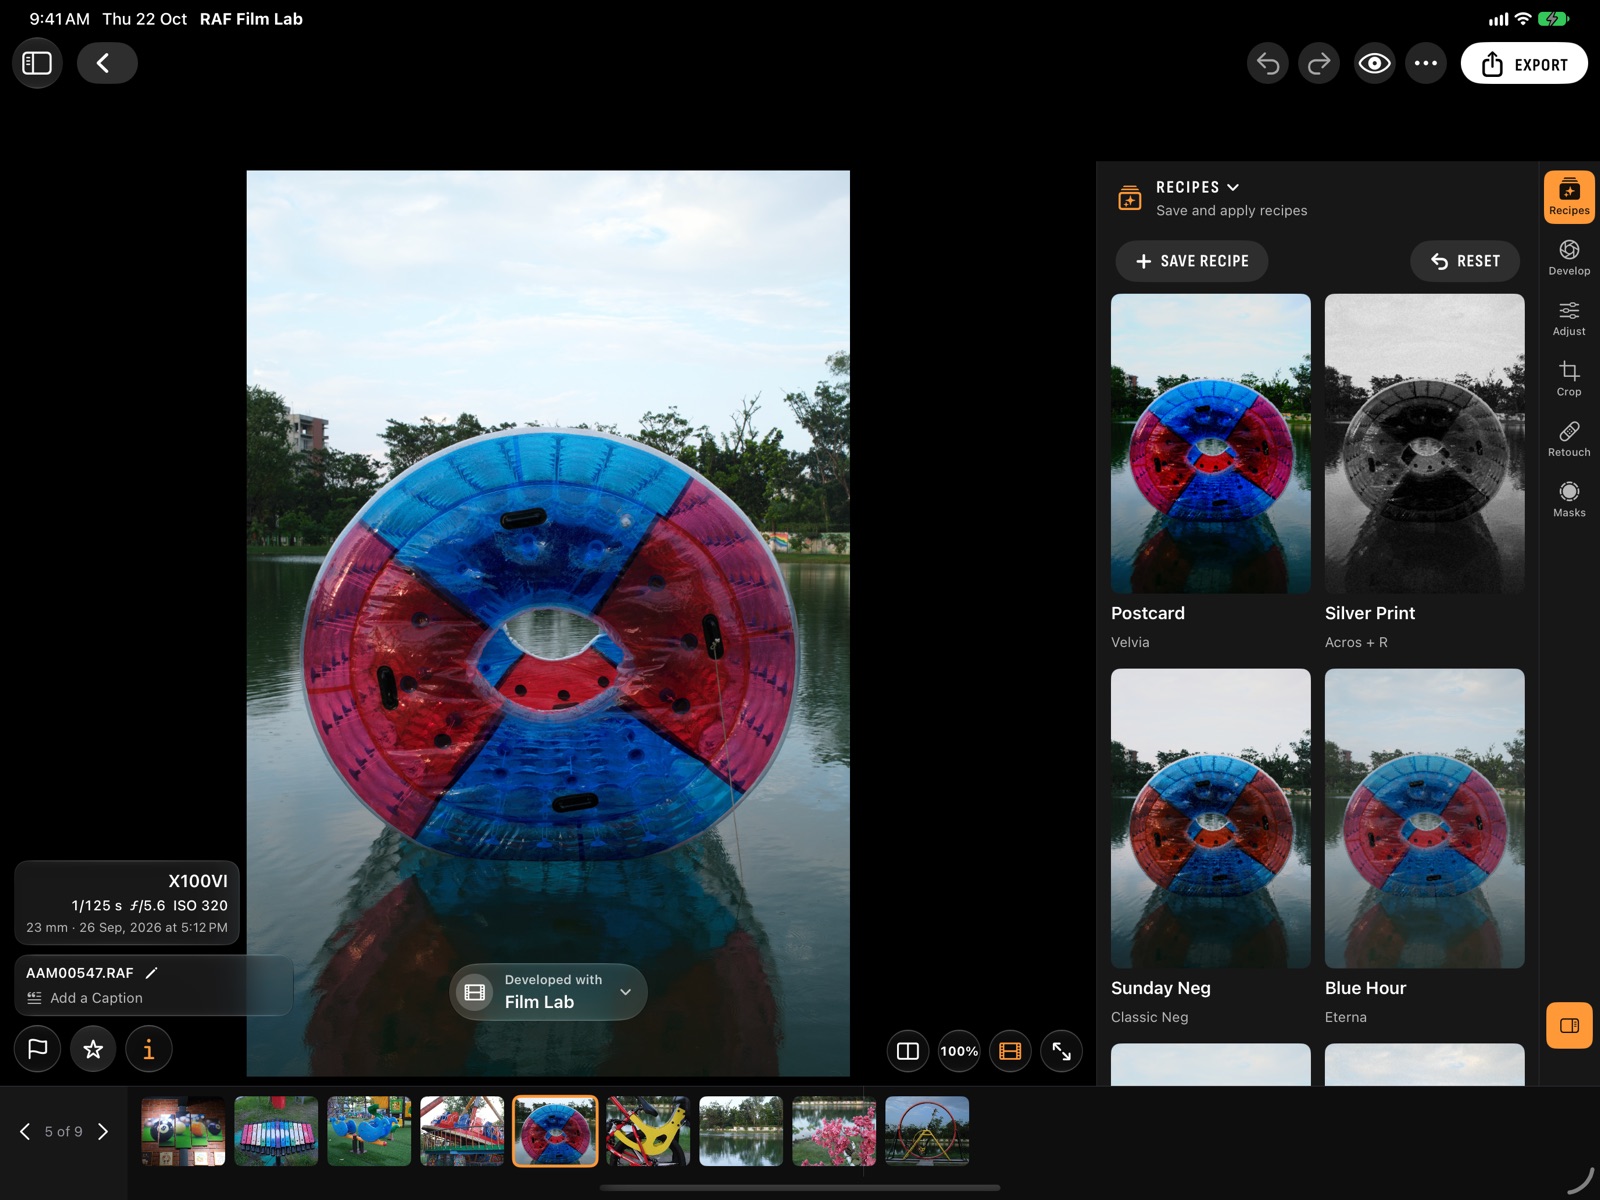
Applying sets only the Develop settings; each photo's own edits stay. Changed your mind? Reset › Reset Recorded Settings goes back to what the RAF was shot with. Already have recipes? Add them with + in Recipes, from a QR code, a link, a screenshot, an X RAW Studio profile or your camera's C1–C7. More on recipes →
7. Finish the photo
Everything from here is drawn on top of the develop, so it changes as you move a slider.
- Adjust: in Light, tap Auto, then fine-tune exposure, highlights and shadows, or bend the tone curve.
- Crop: choose 3:2, or XPan's 65:24, and drag to frame. Tap Auto to level the horizon.
- Masks: tap New mask and choose Sky. It's found for you, on device. Lower its exposure, or warm it, without touching the rest.
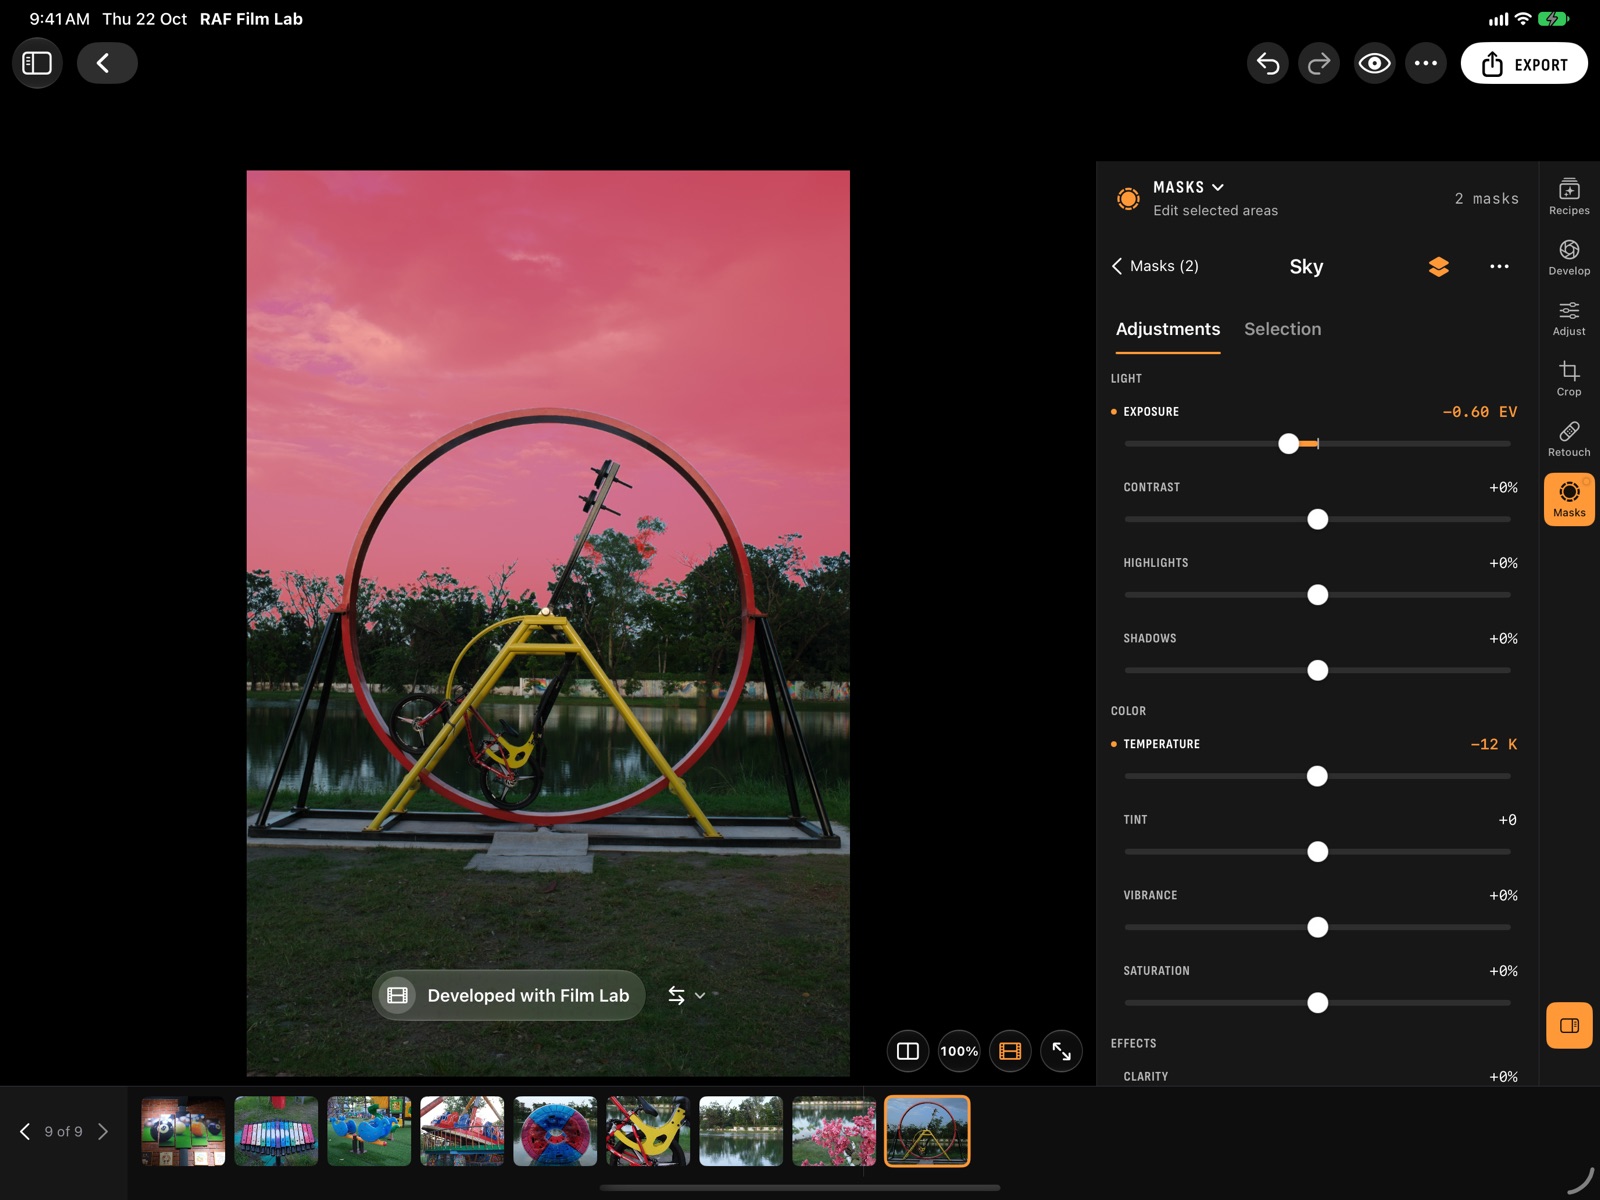
Adjust, Crop, Retouch and Masks in the guide.
8. Compare and undo
Press and hold the photo to see it before your edits, or tap the split button at its foot to see before and after side by side. On iPad the eye button in the toolbar does the same, and on a keyboard \ switches and ⇧\ splits. Undo and Redo take back film settings as well as edits (⌘Z and ⇧⌘Z).
Like this photo's edits? Choose Copy Adjustments (under ⋯ on iPhone, in the toolbar on the Mac, or in a photo's menu in the grid), move to another photo, and Paste Adjustments (⌘C, ⌘V).
9. Pick your keepers
- On iPad and the Mac, the flag at the photo's foot picks or rejects and the star rates. Step through the photos with the filmstrip, or [ and ].
- On iPhone, swipe up on the photo for Info and Ratings, then pick, reject and rate. It stays open while you swipe sideways to the next photo.
On a keyboard, P picks, X rejects and 0–5 rate. For a lot of photos, try Fast Cull (in the toolbar on iPad, under ⋯ in the iPhone library): one photo at a time, full screen. Swipe up to pick and down to reject.
Back in the grid, use the filter to show only your picks, or three stars and up.
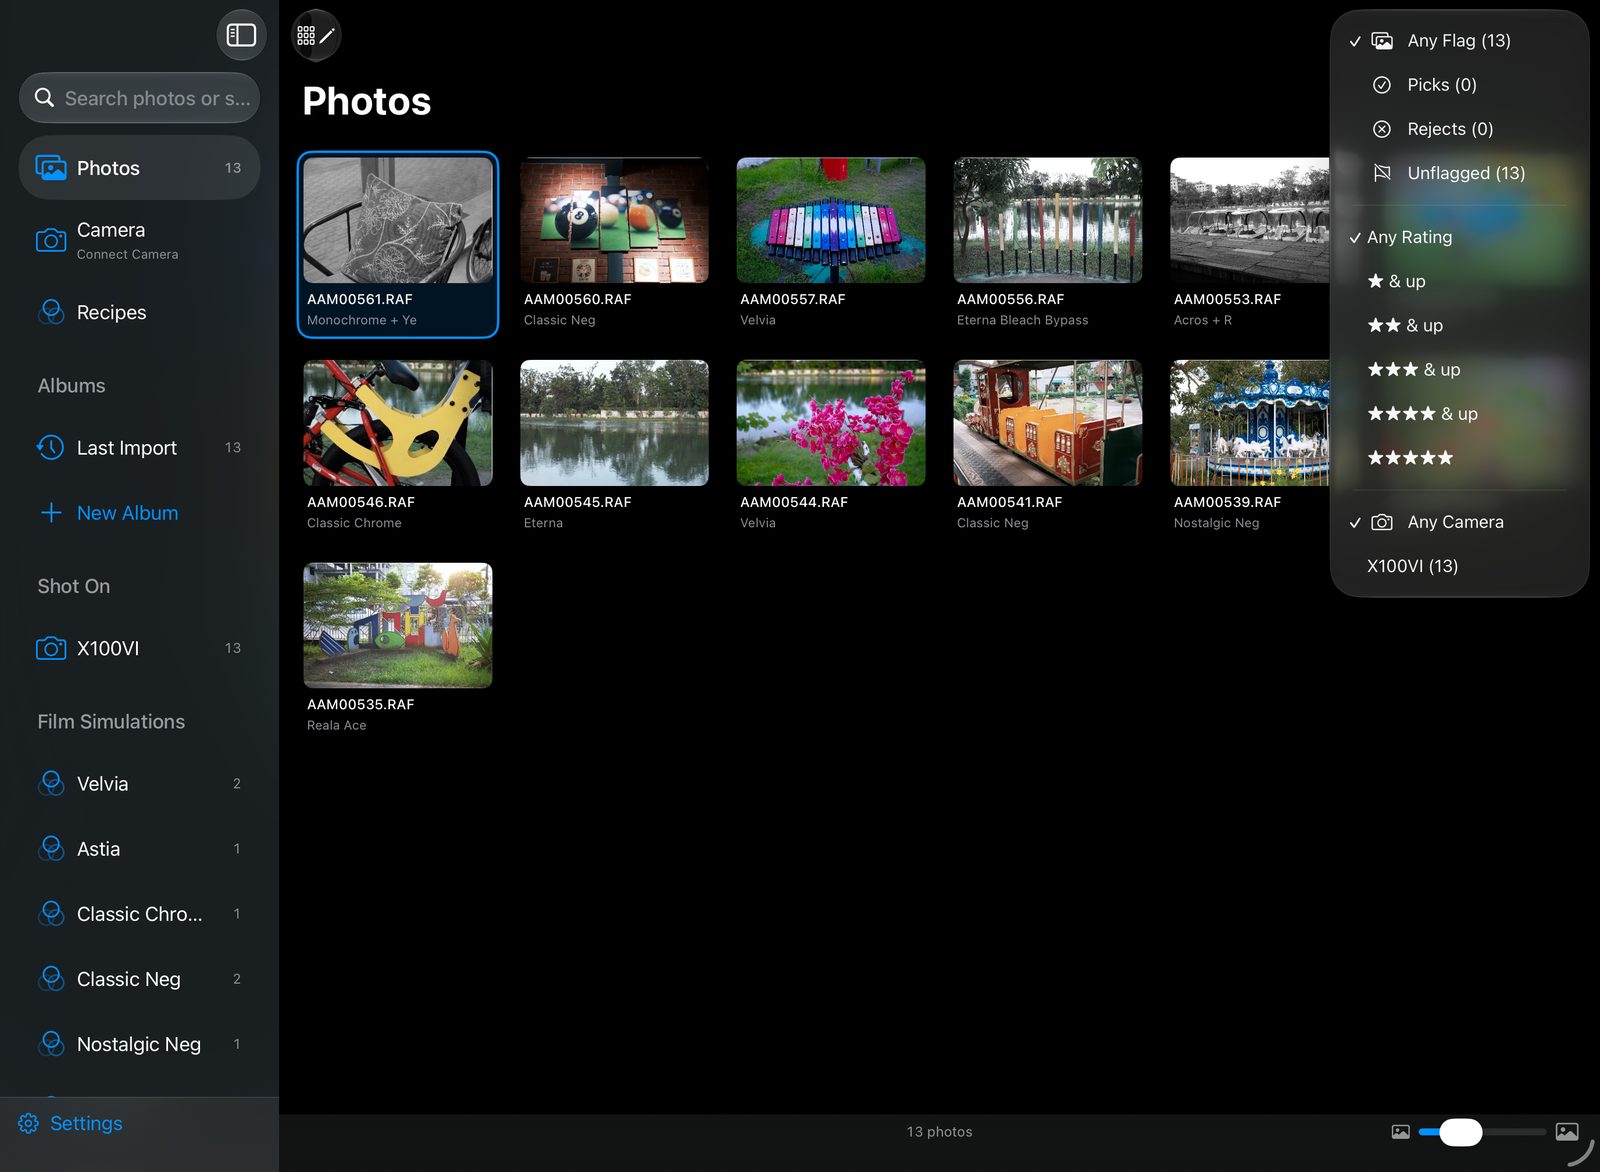
10. Export
One photo: in the editor, tap Export and choose JPEG, HEIC or 16-bit TIFF, the size, and a frame if you like. On iPhone and iPad, Save to Photos saves it; Share sends it on.
Many photos: in the grid, tap Select (iPad and iPhone) or ⌘-click (Mac), then Export. The same selection can become a Collage or a Reel from More. More on exporting →
11. Let the camera develop it (optional)
Your Fujifilm can develop its own RAFs with its own processor, for exactly the camera's look.
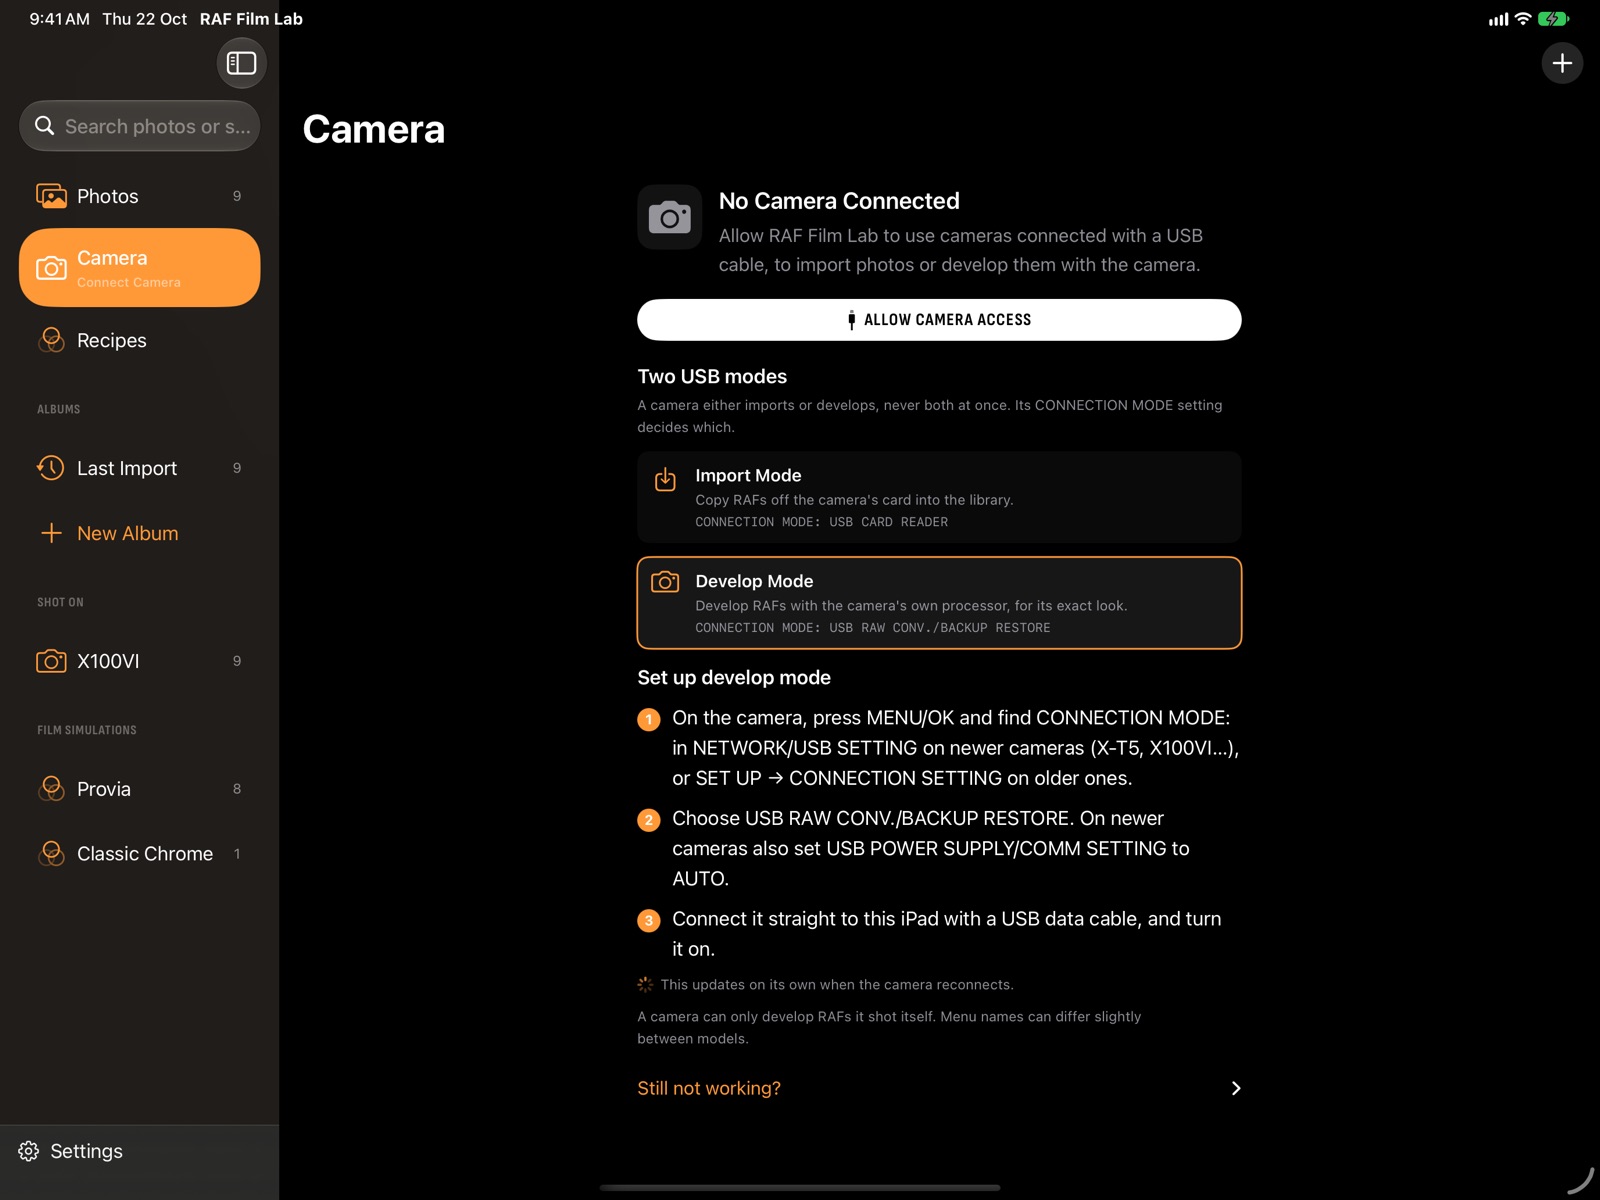
- On the camera, set CONNECTION MODE to USB RAW CONV./BACKUP RESTORE. The Camera page (in the sidebar, or the Camera tab on iPhone) gives the steps for your model.
- Connect it with a USB data cable and turn it on. The Camera page says when it's ready.
- Open a photo that camera shot. In the menu of the develop status at the photo's foot, choose the camera, then tap Develop with your camera.
Switch back to Film Lab from the same menu any time. A film the camera doesn't have? The status says so and offers Film Lab instead. More on developing in the camera →
Where next
- Save your recipe to the camera's C1–C7, and shoot with it.
- Turn on iCloud sync to have full RAFs and their edits on every device.
- Hand the busywork to an AI agent on the Mac, or use the same actions in Shortcuts.
- Learn the keyboard shortcuts.